This is a tutorial for basic UV mapping good for blender GE and rendering as in blender 2.48.1. I'll assume that you're an idiot and don't know how to do anything except add meshes, go to edit mode, and rotate your view. I hope you like this tutorial.
Update.
As far as I know, it works in 2.49 as well. I kinda expect 2.5 to break it though. :}
1. Have your mesh open. eg: default cube 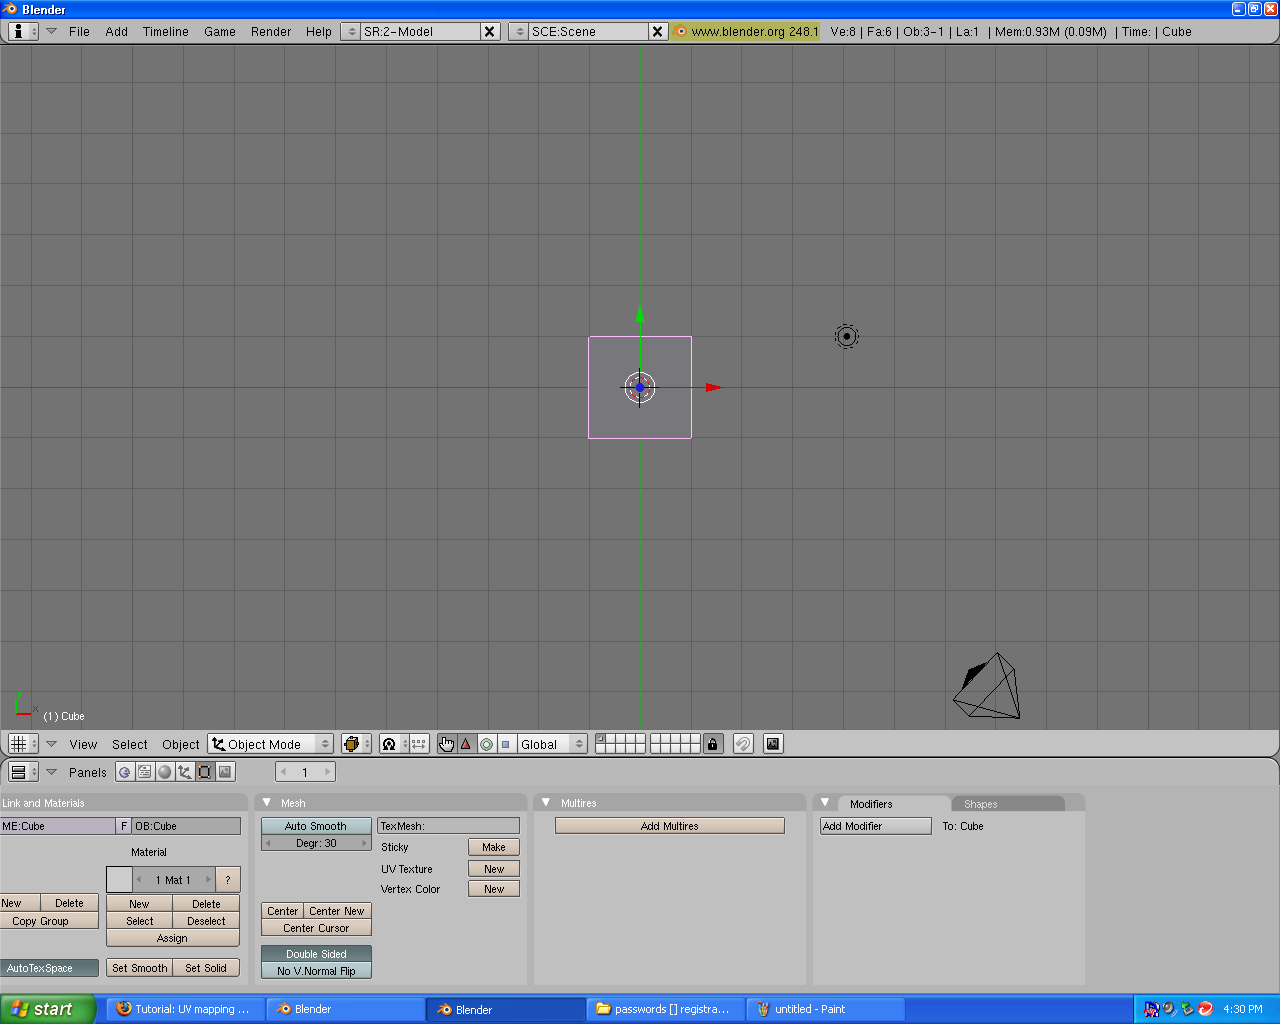
2.split your window by right clicking down the bottom above the buttons.
3. Turn your second window into hte UV mapping window.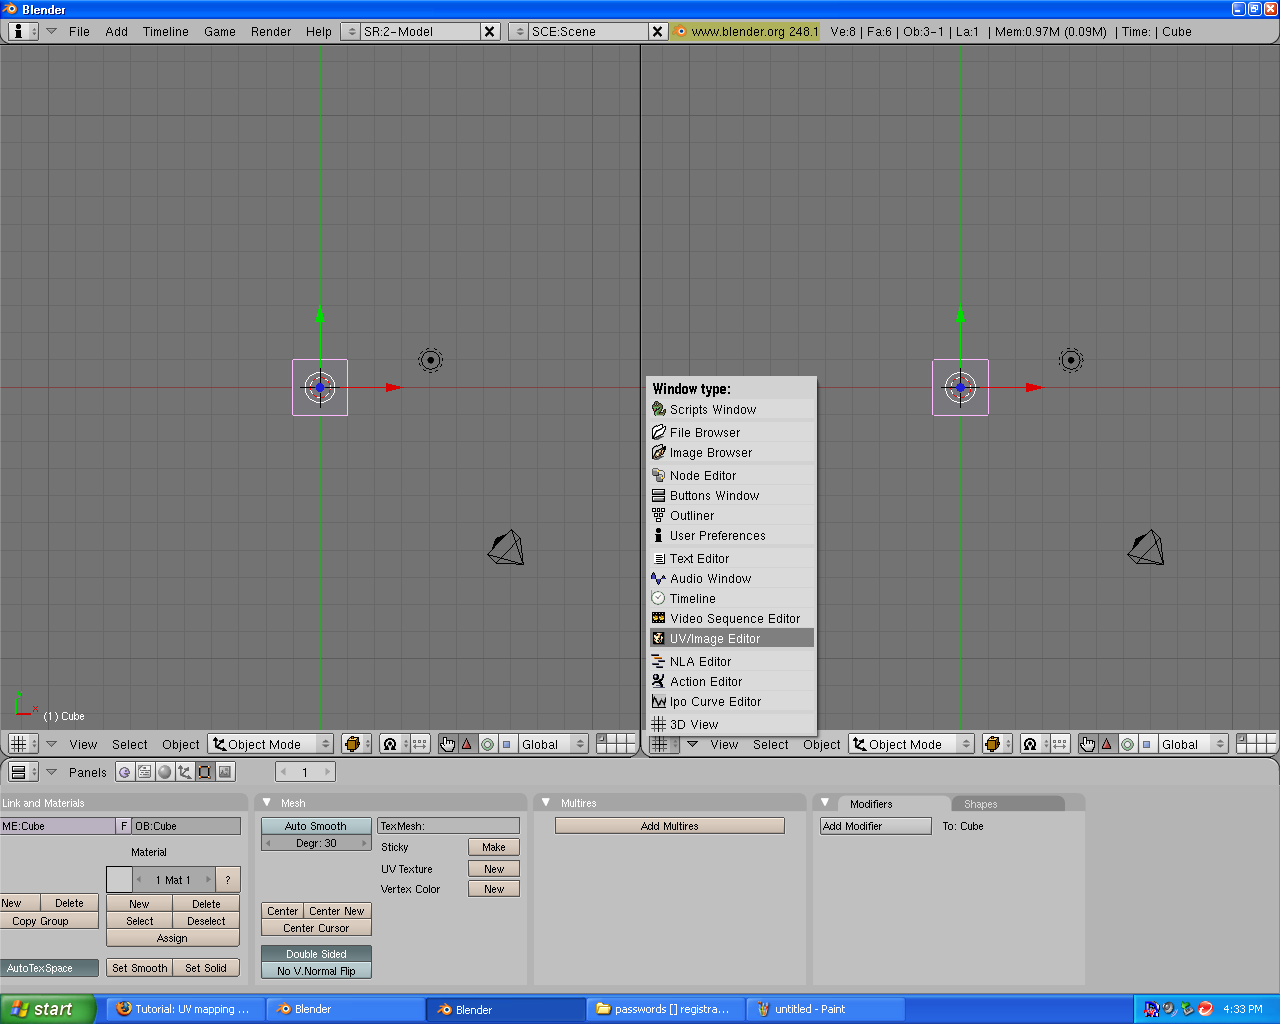
4.select your mesh, press TAB-key to go into edit mode, press A-key twice to select all faces.
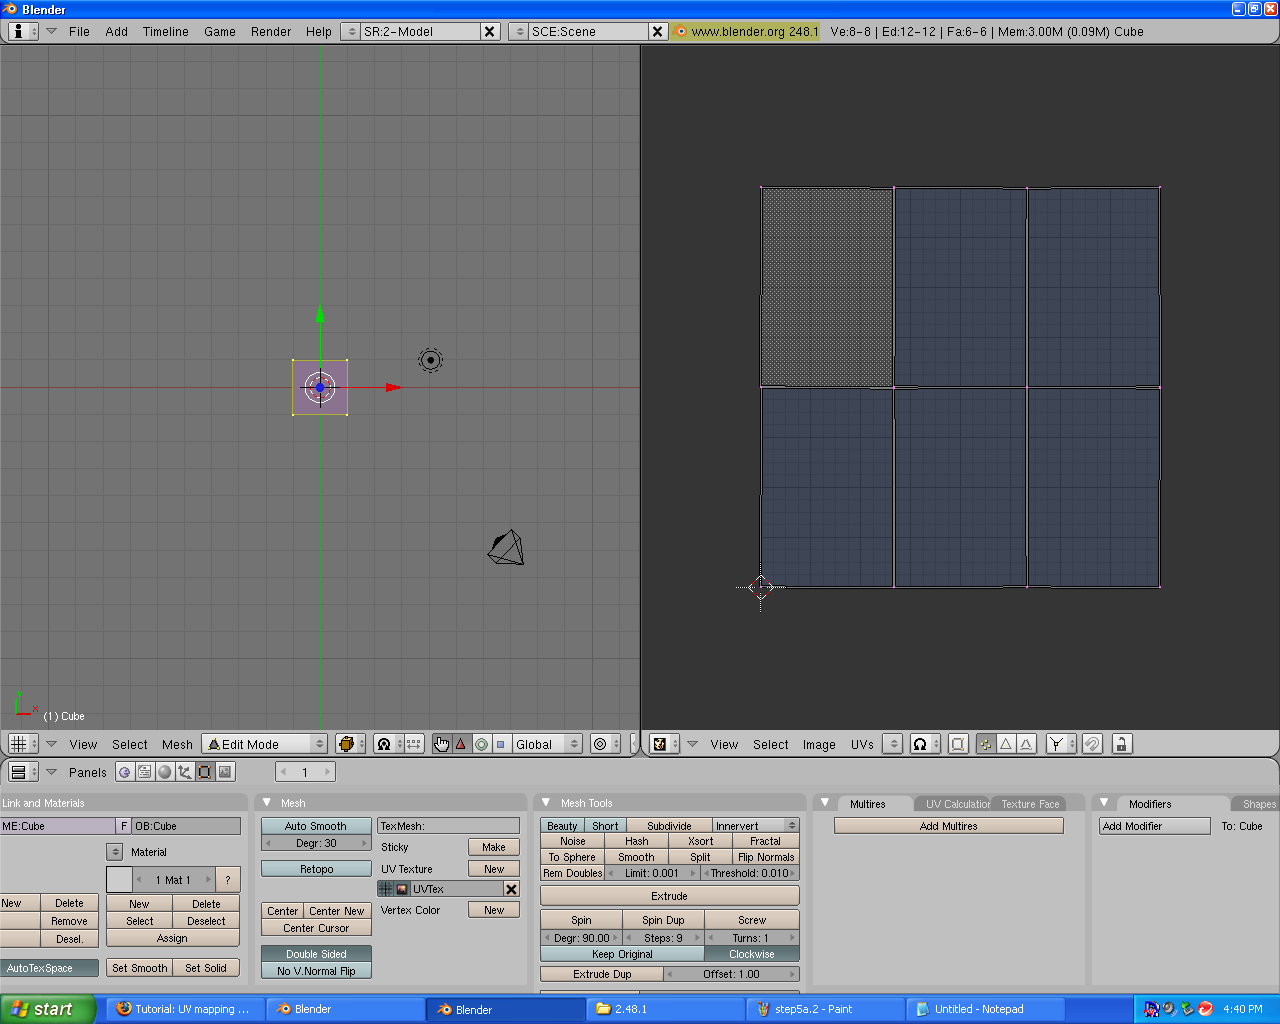
5.press U-key and click "unwrap"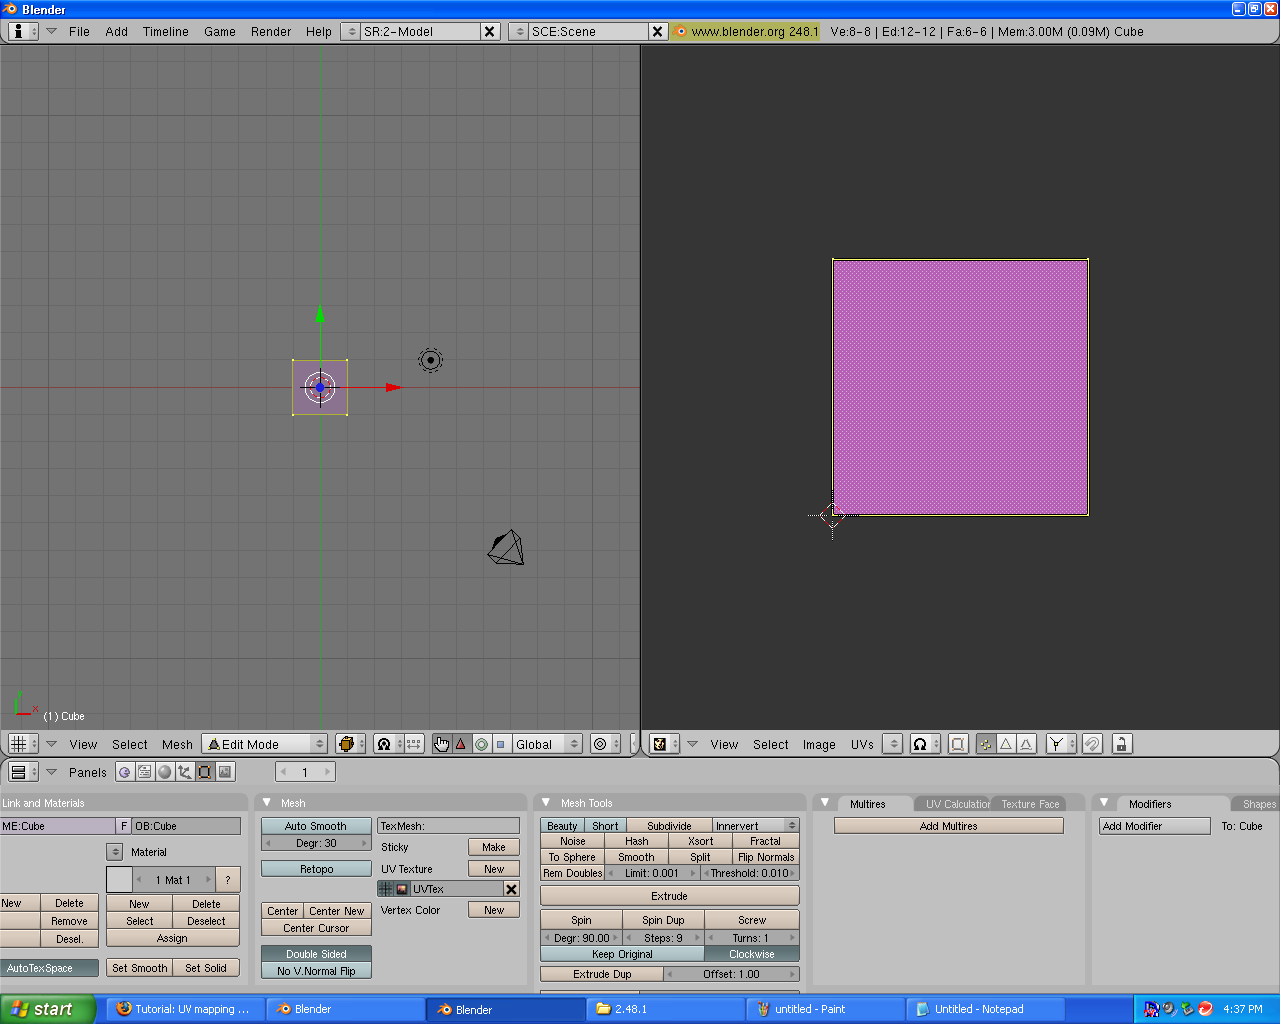
5a. if "unwrap" causes a fairly weird shape (a line or bunch of lines) press CTRL+Z. Do step 5 again but select "unwrap:smart projections instead". Just click OK to the menu that pops up (you can go through the options if you want though). This should leave a good shaped UV map.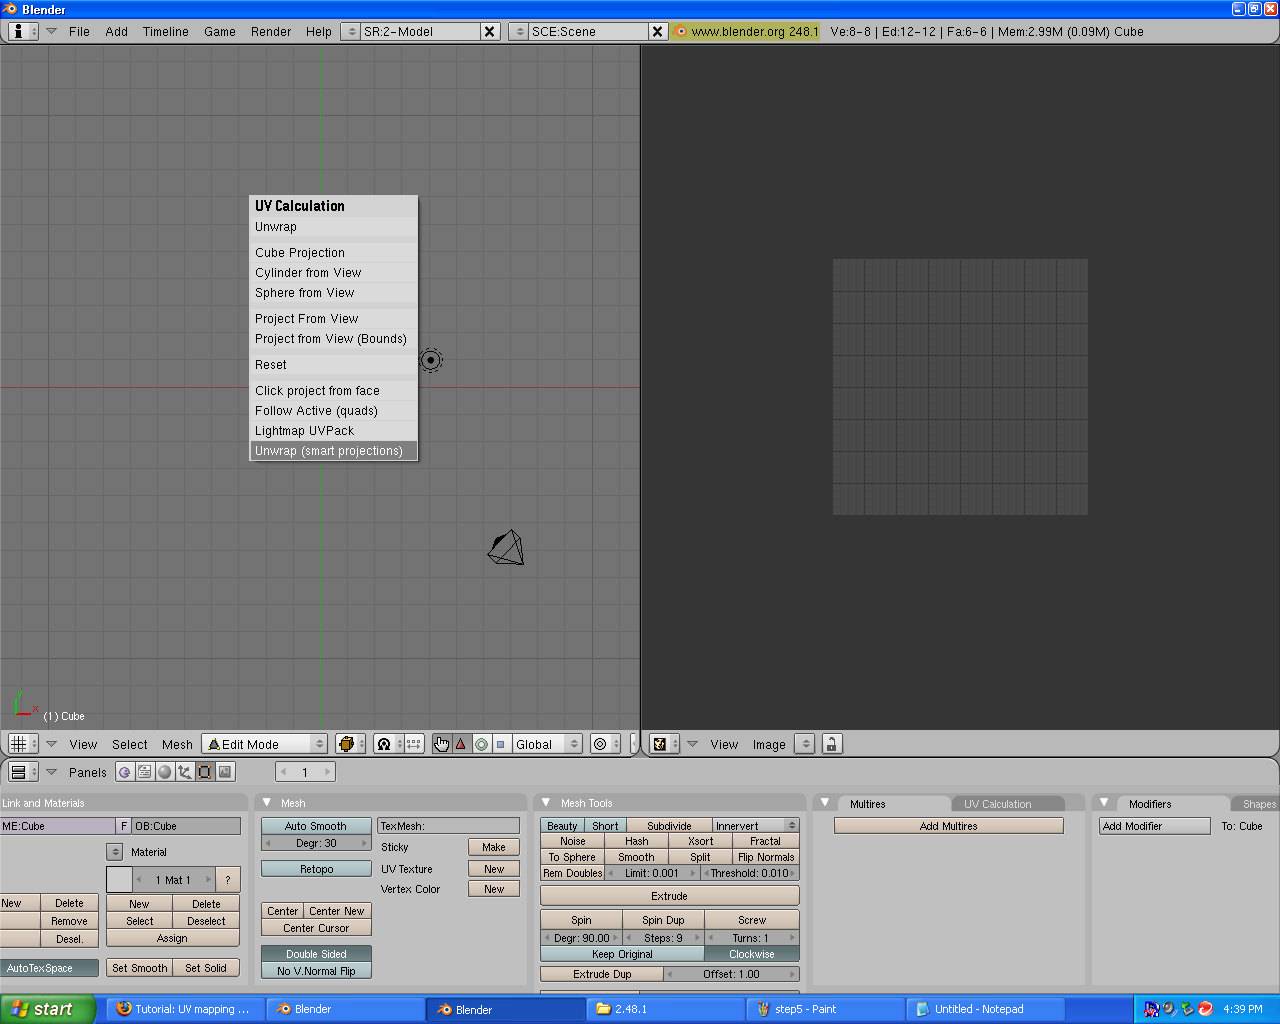
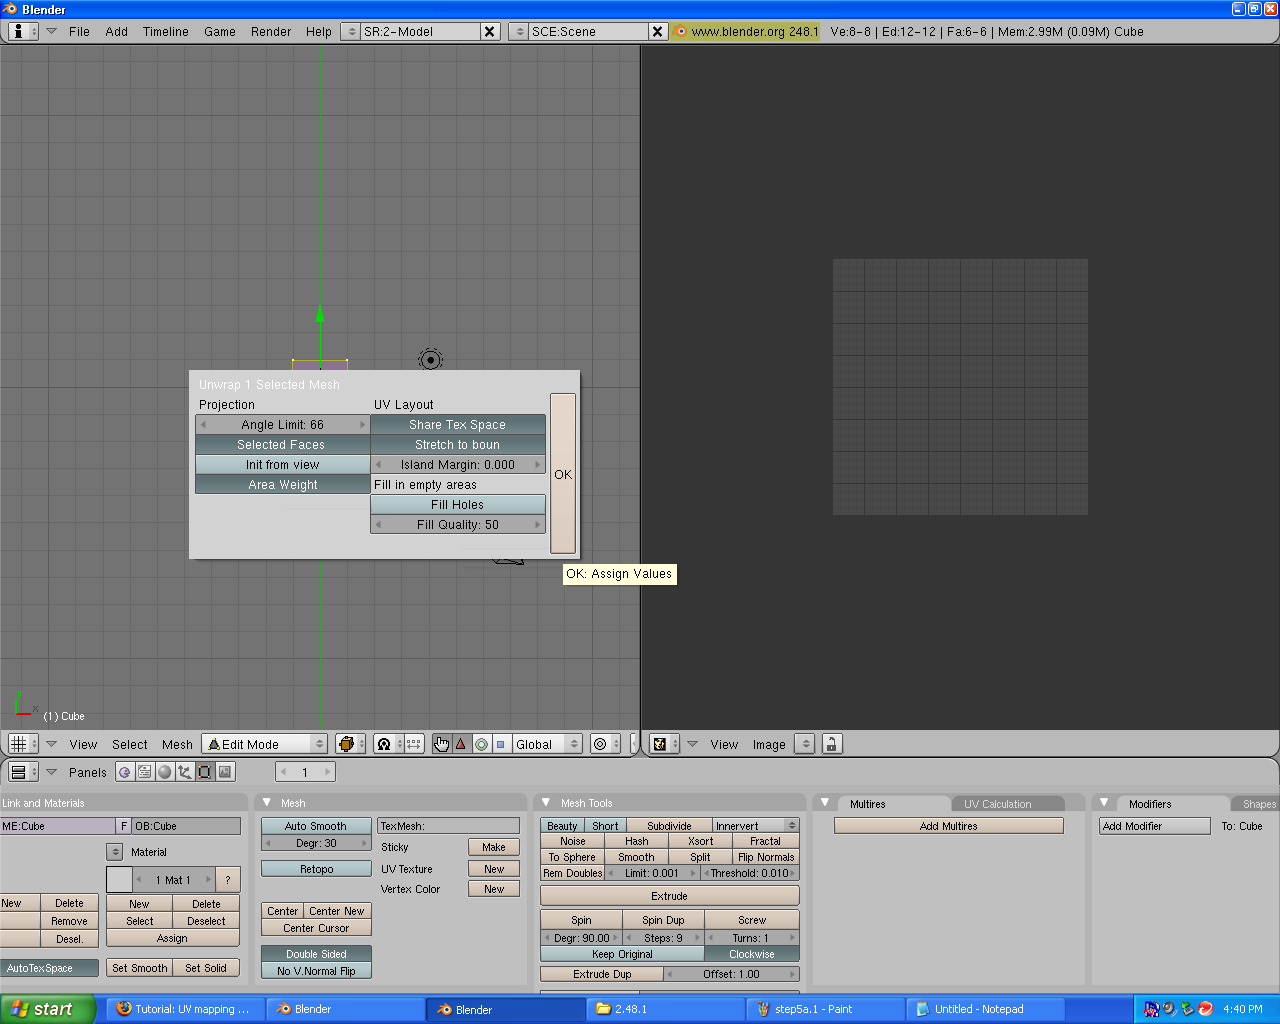
5b. if 5a doesnt' work just go through all the options in the U-key menu after clearing the UV map with CTRL+Z
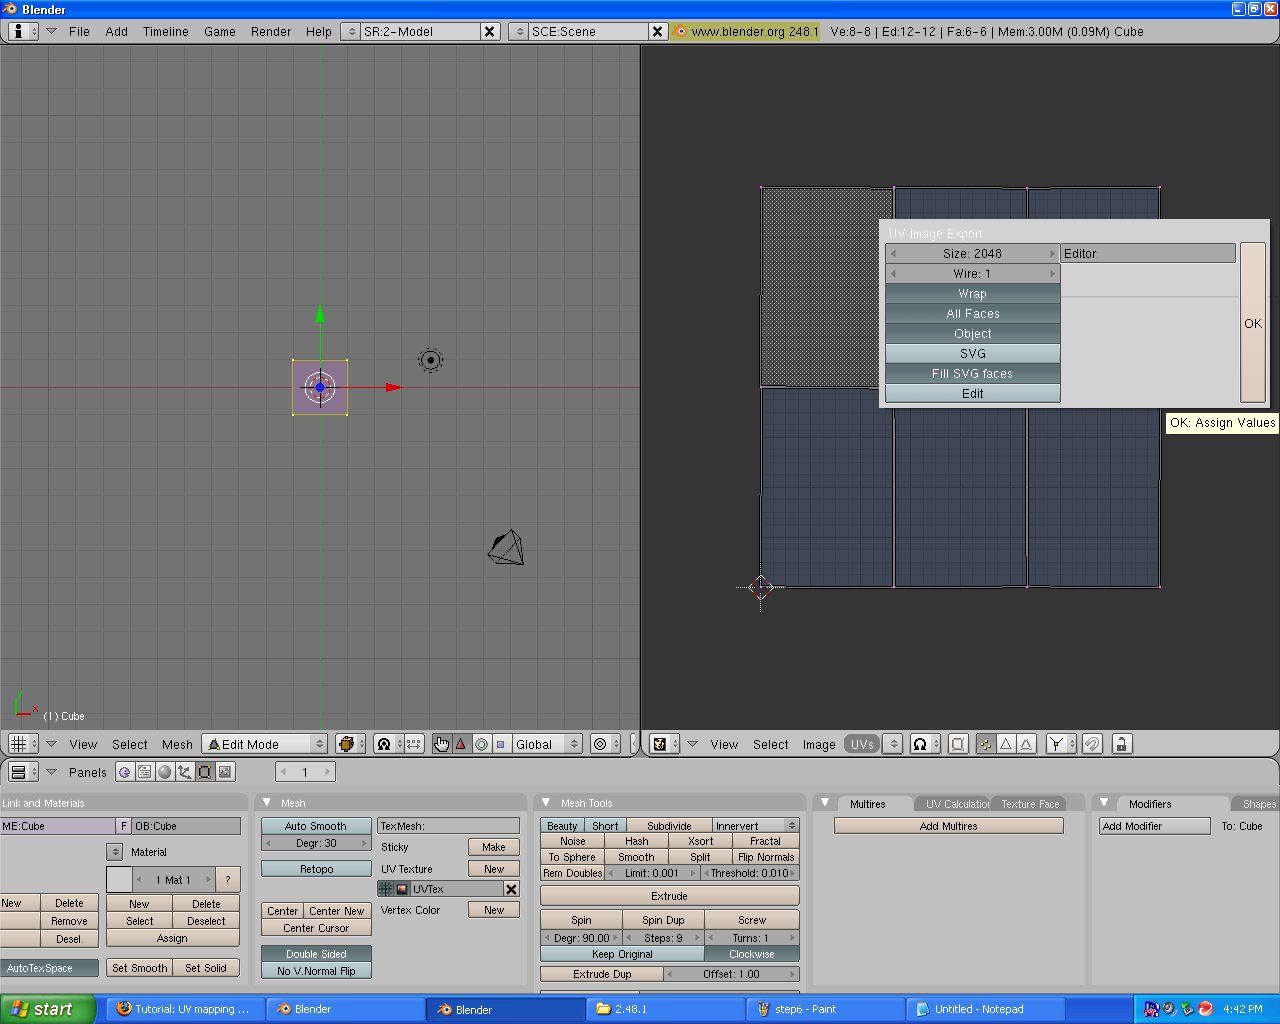
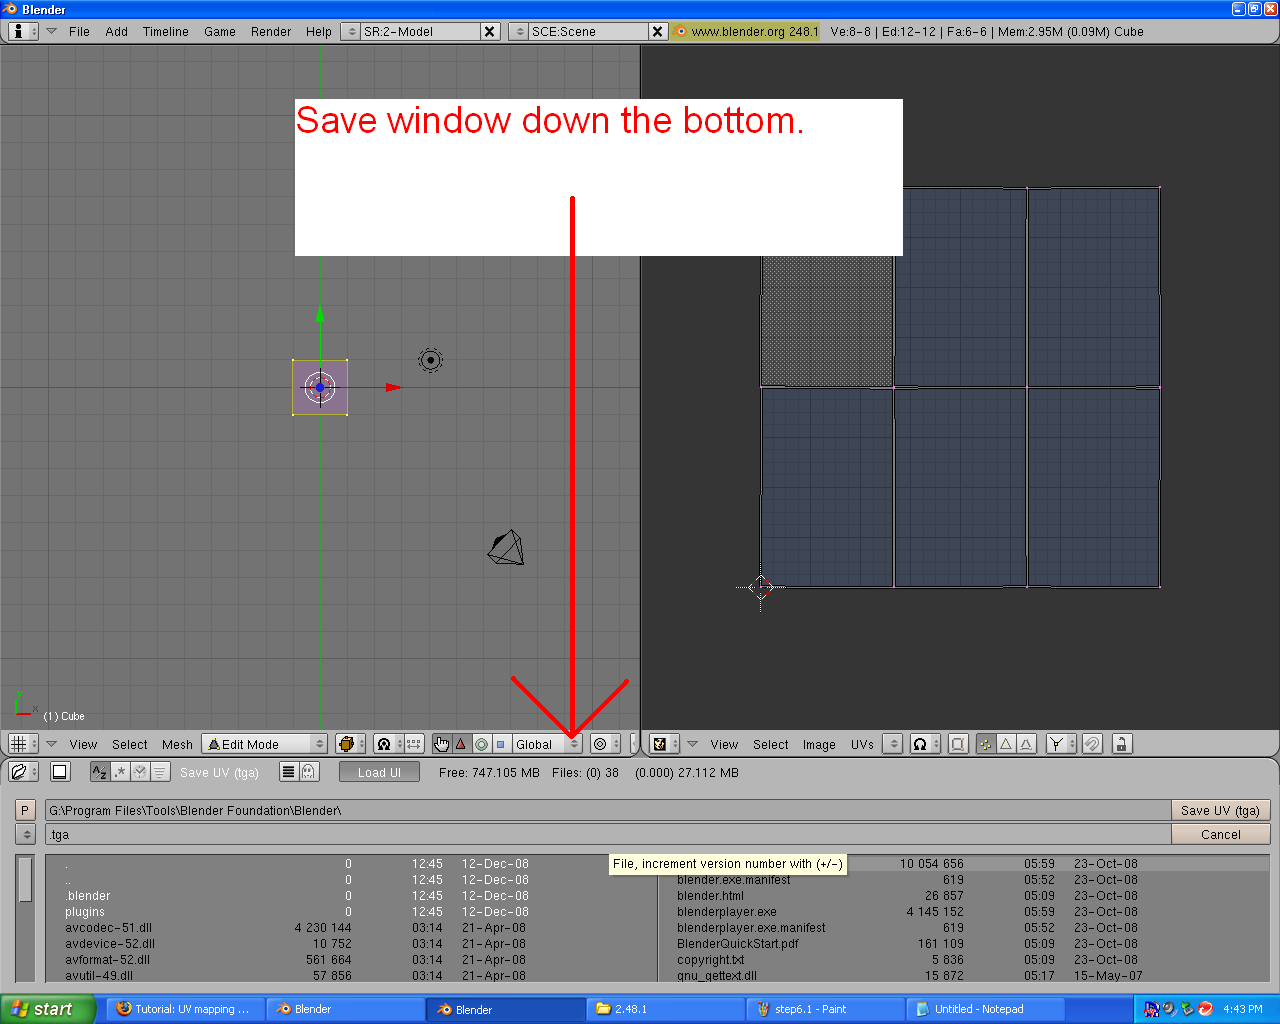
step 6 You should have a UV map. In the UV mapping window click UV>scripts>save UV face layout. just click OK on the menu that pops up (you can have a look through the options if you want.) Choose where to save it. The save menu appears at the bottom.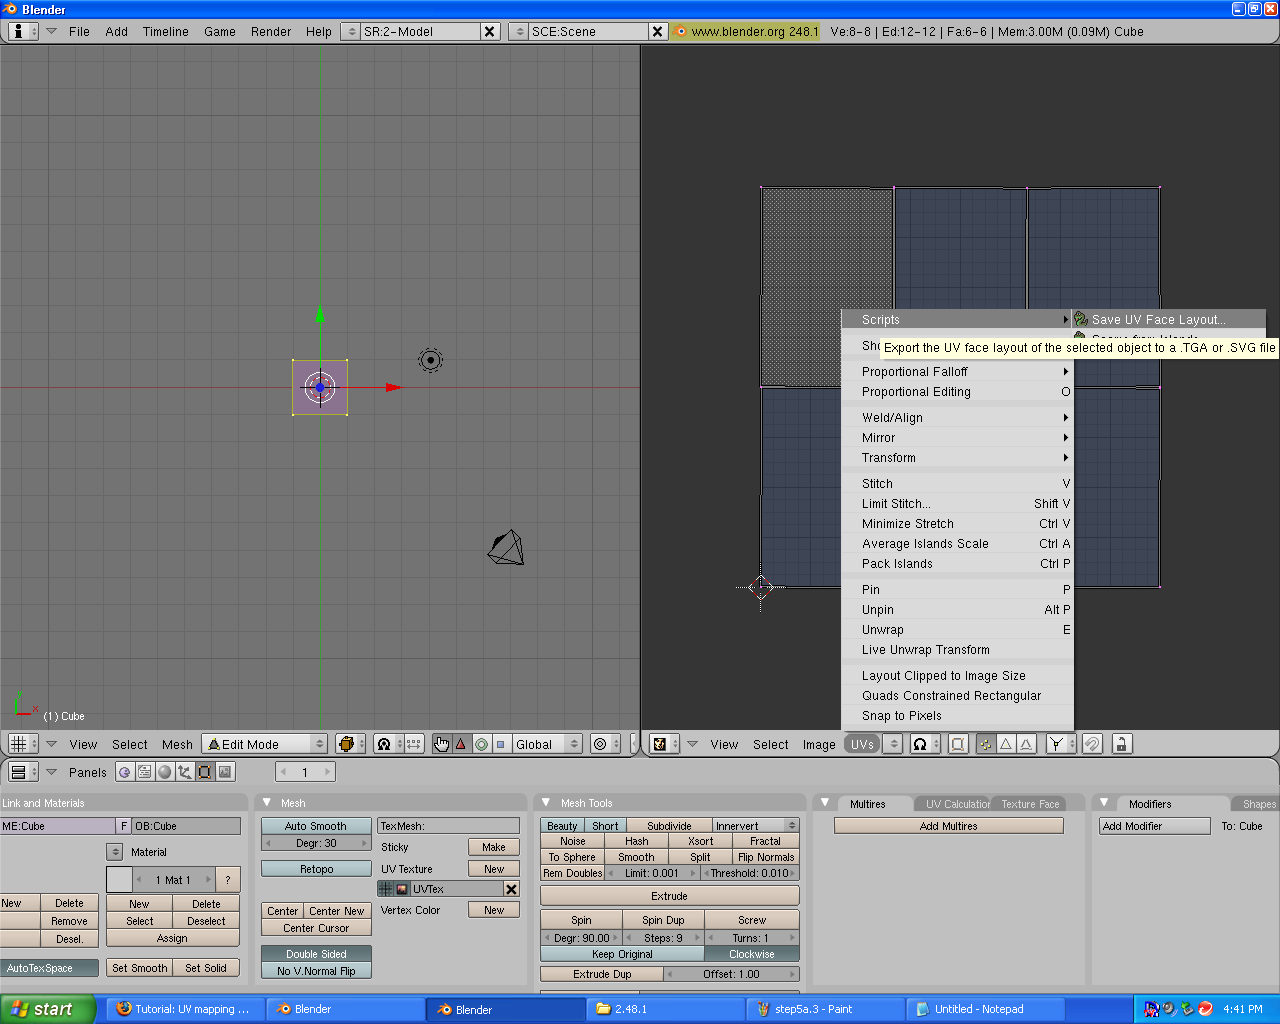
 step 7. Edit this image with your favourite image editing program. for now the most basic paint programs will do (eg.Gimp).I like to number the faces so i know what face in the UV map goes to which face in the mesh.
 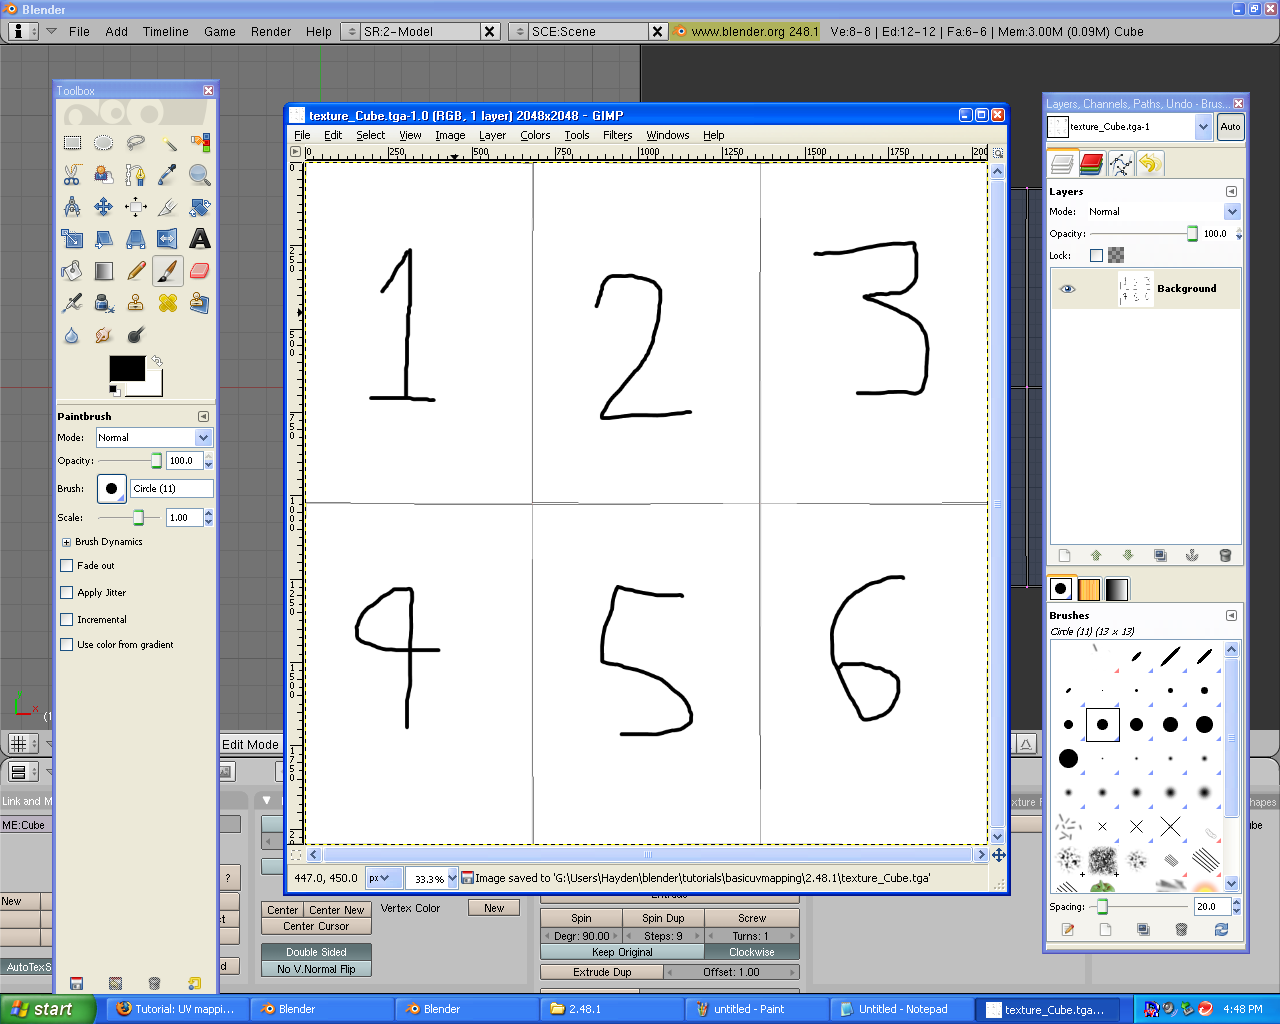 8. Back in blender, in the UV mapping window, select image>open. go to where you saved the edited UV face layout.(the image you edited in step 7)

step 9. exit out of edit mode (TAB-key). Go to the shading tab (F5)
step 10. go to the texture buttons tab (F6) and click "add new"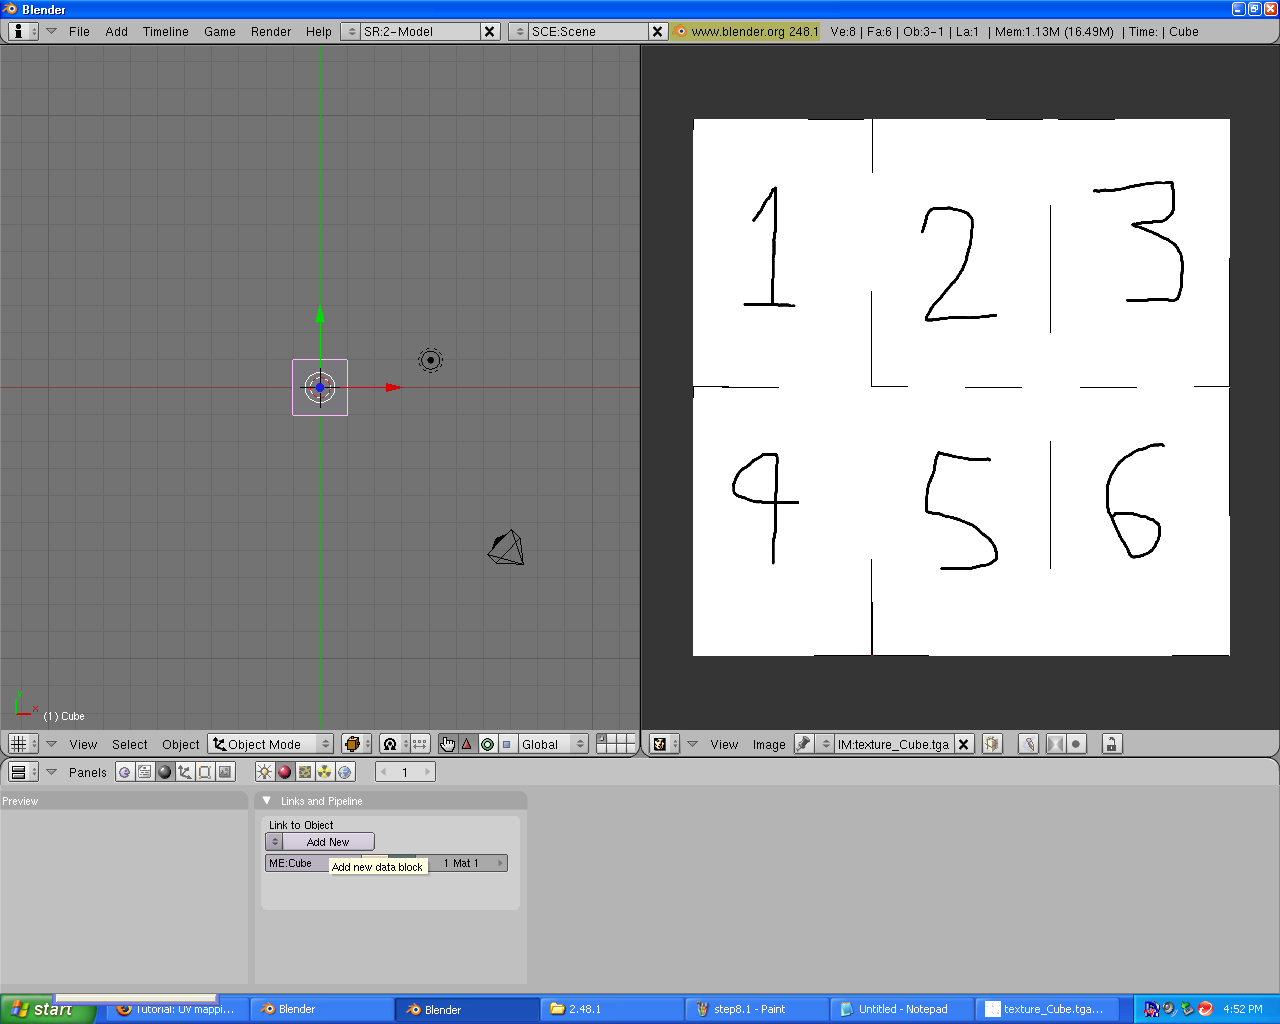
step 11. find the button called "texface". this will allow the texture to show up in renders.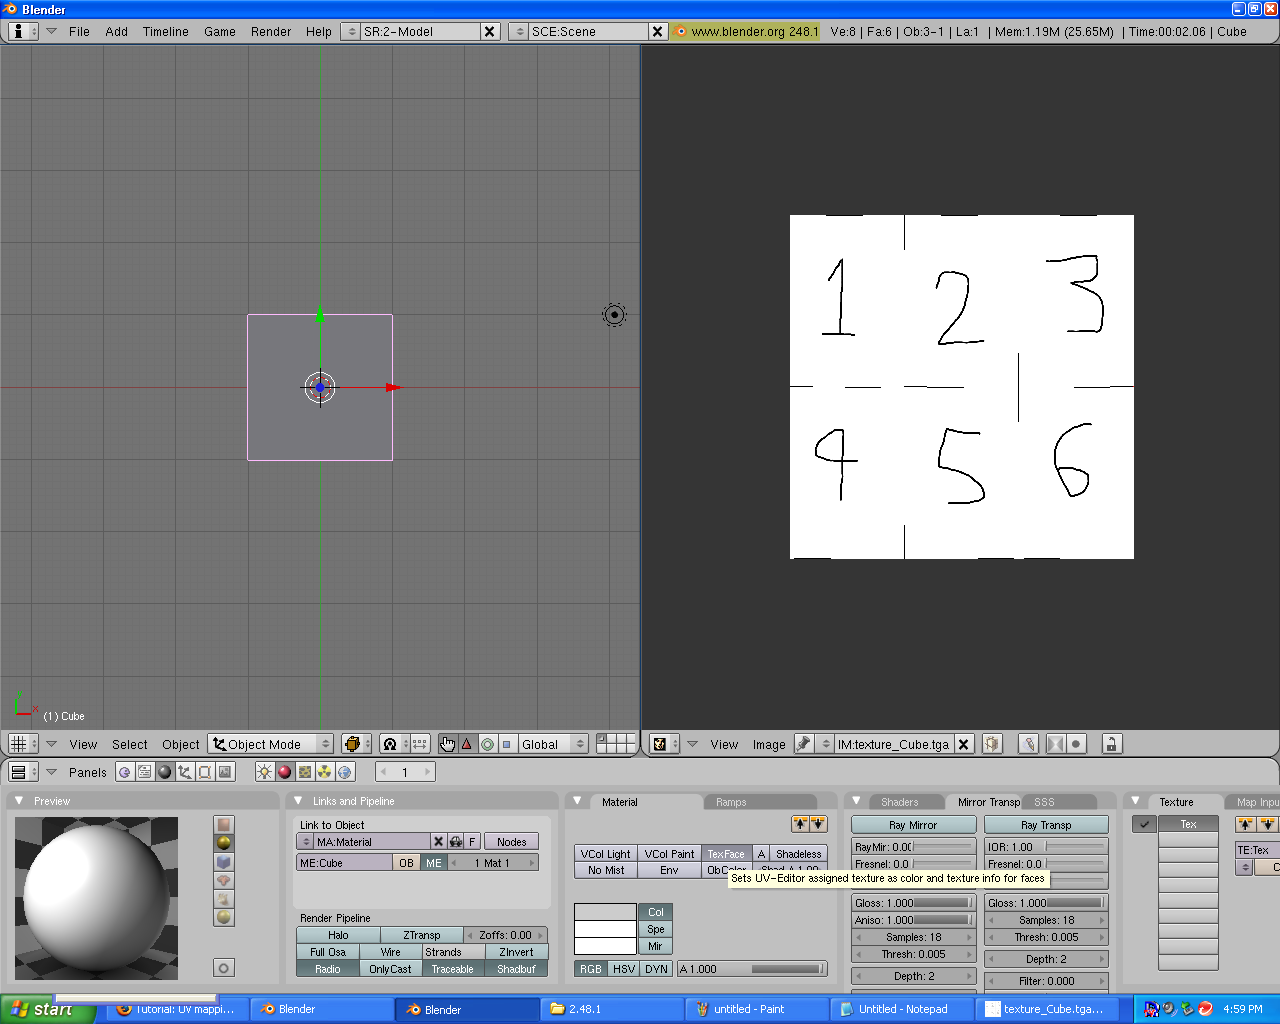
step 12. Press D-key and select "textured solid"
step 13. Find a use for this! You can render this picture and it shows up in the game engine provided the normals are facing the right way.
The files I used in this tutorial are the texture and the .blend file
Extension: Normals Tutorial
2.split your window by right clicking down the bottom above the buttons.
3. Turn your second window into hte UV mapping window.
4.select your mesh, press TAB-key to go into edit mode, press A-key twice to select all faces.
5.press U-key and click "unwrap"
5a. if "unwrap" causes a fairly weird shape (a line or bunch of lines) press CTRL+Z. Do step 5 again but select "unwrap:smart projections instead". Just click OK to the menu that pops up (you can go through the options if you want though). This should leave a good shaped UV map.
5b. if 5a doesnt' work just go through all the options in the U-key menu after clearing the UV map with CTRL+Z
step 6 You should have a UV map. In the UV mapping window click UV>scripts>save UV face layout. just click OK on the menu that pops up (you can have a look through the options if you want.) Choose where to save it. The save menu appears at the bottom.
step 7. Edit this image with your favourite image editing program. for now the most basic paint programs will do (eg.Gimp).I like to number the faces so i know what face in the UV map goes to which face in the mesh.
8. Back in blender, in the UV mapping window, select image>open. go to where you saved the edited UV face layout.(the image you edited in step 7)
step 9. exit out of edit mode (TAB-key). Go to the shading tab (F5)
step 10. go to the texture buttons tab (F6) and click "add new"
step 11. find the button called "texface". this will allow the texture to show up in renders.
step 12. Press D-key and select "textured solid"
step 13. Find a use for this! You can render this picture and it shows up in the game engine provided the normals are facing the right way.
The files I used in this tutorial are the texture and the .blend file
Extension: Normals Tutorial